Showing posts with label recipes. Show all posts

Friday, June 8, 2012

Sugar Rush

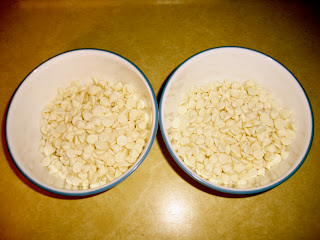
Last night, two things happened. First, my sweet tooth just wouldn't shut up. This is one of my life struggles. I love candy so much. Fun Dip, Nerds, Air Heads, Giant Sweettarts, Mini Sweettarts, you name it. The more sugar the better. Second, while meandering around the kitchen, I made a discovery:


So I found my solution. Perf. I decided to go on a cupcake spree and help make a dent in our overabundance of baking supplies. A win-win, if you will. I'm somewhat of a frosting connoisseur myself (remember the sugar addiction) and happen to believe in maintaining a high level of frosting integrity. I love frosting out of the can just as much as the next guy, believe me. This school year, Karley would leave me the leftovers from the frosting can after she was finished. I've realized that frosting is one of my love languages. But when I make a cake or cupcakes, I like to go old school: Betty Crocker. While this cookbook was published in the days of June Cleaver, it has done wonders for the world of frosting with such a simple yet perfect frosting recipe. Don't let those crazy feminists ever tell you that Betty Crocker was bad for womankind. I'm adding the recipe for you here. My one insider's tip in making this frosting for yourself is to add more milk than the recipe requires. First make it according to the book, then add milk until you get your own preference for consistency. I made 24 cupcakes and had a lot of frosting left over. The finished product is so sugary and delish, you'll never want to eat a whip-cream-esque-knockoff-awful-variety-that-comes-on-those-store-bought-cakes ever again.


I happen to believe that the best kind of cupcakes are chocolate cake on the bottom (devil's food, in this instance) with this vanilla frosting on top. I wanted to spice up my Thursday night so I raided the cabinets and found a bunch of food coloring. Yellow seemed sunshiney and appropriate, so I went with that. I'm also a big advocate of the KitchenAid mixer. My mom has had that thing for years and it is so great. Too many times when I'm in charge of the stirring, you'll bite into a huge chunk of butter that I didn't mix in all the way. It's easier and makes great batter. 


I'm actually proud of the minimal drips on those muffin pans. Usually I'm so messy I may as well just have dumped the entire bowl of batter over the cupcake papers and hoped for the best. Below you'll find pictures of the finished product, which I'm bringing over to my grandpa's after lunch today as a continuation of his birthday week celebration. Remember how I said there was leftover frosting? There isn't leftover frosting anymore. I'll say that much. I also should probably eat about seventeen whole cauliflowers today to counteract the damage I've done to my general health and nutritional balance. Worth it. 


Thursday, February 16, 2012

Sippin' Champagne

Hay layyyydiessss! Or guys too. Some guys enjoy drinking girly sounding things like strawberry champagne smoothies. Not that there's anything wrong with that. (Yep, you got it. Yet another Seinfeld reference. I can go on if you want.)

Yep, you're super perceptive and inferred from the above paragraph that I'm going to show you my new favorite drink: Strawberry Champagne Smoothies! Great reading comprehension guys! Usually I would say, "Hey friends, make this for those dainty special occasions that call for an adorable champagne toast!" Well, our circumstances were not as glamorous. It was a boring Wednesday night. Susan was on Pinterest. Anna had some strawberries. That's what happened.

Here's the (short but sweet) list of ingredients:
1 bottle of champagne (we chose a classy $7.00 variety from Dominic's)
1 16 oz container of strawberries
2 TBSP honey (preferably out of a container shaped like a teddy bear, believe me it's better that way.)
1 blender (or really fast and really strong person to stir manually, but just get a blender to make this work.)
2 ice cube trays
2 days (so plan ahead!)


First step. Pour HALF of the bottle of champagne into the blender (save the other half in the fridge for later!). Then, wash those strawberries! Who knows what's on 'em - they've been living side by side in the fridge with your roommates' leftover pasta and old sour cream containers. After cleaning them and cutting them up, throw your sparkly clean strawberries in a blender to join that half bottle of champ you added earlier. Finally, to finish this first step, add in that honey to top it off. Then blend it! (Make sure the cap is tightly on before you press that blend button. It's in the details, people.)


Now you have a good looking pitcher of stuff on your counter! To finish the first day's work, get out those ice cube trays and pour the delicious mixture into them to make little smoothie ice cubes once you put them in the freezer. (Now on the down low, do the classy thing and drink the extras yourself. Hey, if you supply your roommates with a drink this good, you deserve it.) 

Oooo. Champagne-y. And Strawberry-y.
Such a careful pourer. I can't be trusted
with tasks like this. 
Fun ice cubes amongst the Pizza Rolls
Yep. This happened. 
Next step in your list of instructions: Go to bed. Those ice cubes need time to freeze, so the best thing you can do is sleep. The next time you give me a list of things to do and include a command to go sleep for awhile, I will listen. What can I say, I give good directions. When you wake up the next day, there's a nice little extra incentive to get out of bed waiting for you in the freezer. Now isn't that nice? Take your cool new ice cubes and pop them out into the blender again. Bring out that other half bottle of champagne and throw it in with the ice cubes. Blend that together, and voila! You have now made strawberry champagne smoothies for everyone to enjoy! Now all that's left to do is find an occasion for which to have a fancy toast. We went with: It was Thursday. A worthy occasion, in my opinion. 


The strawberry ice cubes and the rest
of the champagne, just before the last step.
This recipe will also make your roommates indebted to you and
you might get a favor someday in return. I'm giving these away for free, people. 

Thursday, February 2, 2012

Tastes Like Chicken.

That's because it is chicken. I am about to share with you, my friends, one of the best recipes on earth. Sole credit goes out here to my mother, Kathy Gesch, or Special-K as I like to call her. Every time I call to tell my parents I'm coming home I expertly weave it in the conversation somehow that it would be swell to have this dish and my mom always delivers. I called her today whilst wandering listlessly through the spaghetti section in Jewel for new ideas and she gave me the down low on this recipe. Ladies and Gentlemen, I give you: Dijon Parmesean Chicken. 


First things first. Let's get all your ingredients in order.


Here's what you need:
Boneless skinless chicken breasts
1/3 cup melted butter or margarine
3 Tbsp dijon mustard
1/2 tsp salt
1/2 tsp worcestershire saurce
2/3 cup seasoned breadcrumbs
1/2 tsp paprika
1/4 cup parmesan cheese
2 Tbsp parsley
1 9x13 pan and 2 smaller pans for dipping
A good attitude and some fab background tunes (almost the most important ingredient)


This may be a good moment to let you know of my utter repulsion to touching raw meat. It feels like you're touching something dead. OH WAIT. YOU ARE. How do all you moms who cook every day get over that fact?! You guys are brave. But I figured, Anna, you gotta man up and do it for the sake of the delicious chicken that comes at the end of this ordeal. So I got brave and took it like a Gesch.

You set up your stations, like pictured above. You have your (rinsed off) raw chicken friend (gross) first, followed by a pan of the mustard, worcestaeroiajsdf sauce (it's hard to spell okay?), melted butter, and salt. The second pan is all the other ingredients for the outside breading. You go assembly-line style, first dipping it on both sides in the mustard mixture pan, then rolling it around so it's well coated in the breadcrumb mixture pan. Then you throw that baby in the 9x13. BadaBINGbadaBOOM. Repeat until the rest of his raw posse is properly coated and breaded. Like so:


Oh and by the way, your hands will look like this:


Gross. So now, all you have to do is throw it in the oven for 45 minutes at 350 degrees. That's farenheit, not celsius to all my European readers (ha.ha.). Today I prepared it earlier and then covered it with saran wrap in the fridge to pop in the oven when we were ready to eat. My mom took specific care to remind me to take off the plastic wrap before you put it in the oven. That may seem stupid to you guys, but that is something I probably need to be told from time to time. I need more, as my dad would say, Situational Awareness™ sometimes. Yes I just claimed that my dad trademarked the term. He may as well have. 


When you take it out of the oven, it will look like this: (And smell even better)


And the last ingredient that I forgot to add above is: your roommates! They help you eat stuff that you make. Otherwise I'd be eating this recipe for a week straight. I mean, I wouldn't mind eating it every day all that much to be completely honest. I tend to go at things a little too strongly. Example - the latest in our house is a blueberry obsession and there are currently 6 boxes of blueberries in our freezer that I snack on every single chance I have. But I'm trying to be a normal human being and eat in a somewhat balanced way. Ahh my friends together for dinner. So choice. 

Wednesday, December 21, 2011

It Ain't Easy Being Green

This post is rated 21 and up. Well, not really. You can still read it, but don't come crying to me that you aren't old enough to buy the ingredients. You've been warned. 

I whipped up a batch of these for my friend's bachelorette party the other night and it was a hit. I thought you, also, might enjoy being a hit, so here is the secret to holiday drink goodness. My friends, I give you: The Grasshopper. A sure-fire addition to any Christmas or New Year's party. Or any party for that matter.

I did a little research (Wikipedia is so handy) and found out that this cocktail originated in New Orleans at a bar named Tujague's in the 1950s. Well, my recipe originated in Cedar Grove from the Gesches sometime in the 90s or something. It combines minty goodness and ice cream and is fabulous. 

Here's what you'll need:
1) A thing of Cool Whip.
(And yes "thing" is a technical term of measurement)
2) A 5-quart bucket of vanilla ice cream.
Ideally a limited edition Green Bay Packer vanilla ice cream.
3) 1/2 cup of Creme de Cacao and 1 and 1/2 cup of Creme De Menthe
This is what makes it delicious, green, and minty.
4) A really big bowl
Let's do this. Before you start I would advise letting all the ingredients sit on the counter for about 15 minutes to thaw. It will let the ice cream and cool whip soften up and make this whole process a lot more painless.  

First things first, spoon almost all of the vanilla ice cream into the big bowl. I'd leave out a little bit because the finished product is going back in that 5-quart Packer-themed bucket. After the ice cream, add in all the cool whip in a similar fashion. 


Now, throw in the Creme de Cacao and Creme de Menthe. It will look really green and weird. Like this:


Now you start stirring. As you can see from the picture, I am using a massive spoon. It is the most handy spoon in our whole kitchen, but I have theories that it was once one of those decorative ones you nail to the wall to look country chic or something. However it got here, I'm glad it's around because it makes this job a lot easier. It will start to look more like this...


...which, I know, does not look appetizing, but we all know never to judge a recipe until it's finished. Or books by their covers. Or people by their appearance. Check you out, thought you were just getting a delicious how-to session and I slipped in a life lesson when you weren't looking. Anyway. When you break into Jillian Michaels beast mode and flex those stirring muscles, the end result will look like this: 


As you can see, in the end I called in the whisk for reinforcements. Your hard work is almost done. Now, all that is left to do is pour this finished mixture back into the empty ice cream bucket. This makes it super easy to tote around and seal back up. 


Keep it in the freezer and it will last you for a LONG time. Unless you have to entertain 40 people, then it will be gone immediately. Just scoop it out into little cups for everyone's happiness, minty-ness, and holiday cheer. Even if you are the lame one in the group, bringing a bucket of this will boost your ratings, guaranteed. Now go forth and conquer! 

2 out of 2 friends agree that this is delicious.

Monday, December 5, 2011

Truffs. (Truffles.)

Get with it with the abbrevs. I hope you're catching on.

I'm no Rachel Ray. My palate is about as refined as a 7-11 on a Friday night. (Weird simile, sorry.) But I appreciate good food from time to time. Know what I appreciate most of all? Delicious chocolate truffles. Thanks to my dear friend Nicole and her famous truffle recipe, I was able to make this delicious confection possible. Let me take you through the process. This is your list of ingredients:

2/3 cup heavy whipping cream
2 bags of milk chocolate chips
1 stick of butter or margarine
1 cup crushed chocolate cookie
1 teaspoon vegetable oil
1 bag white chocolate chips (or white chocolate bark)


Let's DO this thing. Step #1: Stand in awe of the caloric value on your kitchen counter. It is truly mind-boggling. Let it sink in...and move on. These things are worth it.

Step #2: Put the butter and heavy whipping cream in a saucepan. Bring those ingredients to a boil.


Step #3: Add ONE of the bags of milk chocolate chips to the boiling mixture. Once the chocolate is melted, stir in the crushed chocolate cookies.

Step #4: Pour the contents of the aforementioned saucepan onto an aluminum-foil-lined cookie sheet. Put in the fridge.


Step #5: Take the cooled mixture and form into little chocolate balls, like pictured above. This will be the filling of your truffles. Put them back in the fridge or freezer to make sure they stay all together.


Step #6: Before you started this process, you added a little oil to all the chocolate chips you melt (both milk and white chocolate). Just letting you know what you did already. Now melt the OTHER bag of milk chocolate chips and dunk the truffles you already started forming in the melted chocolate. Like above. Put back in the fridge to cool.


Step #7: This is where those white chocolate chips come in (remember you already put a little oil in there?). Melt them. In the microwave. It's the easiest way. 


Step #8: Use a spoon to drizzle the melted white chocolate on top of the truffles, like so. It makes it look all fancy. (Nicole, the originator of this recipe, cringes when I do this step. She is much more OCD and neat whilst drizzling. Personally, I like to take the Jackson Pollock approach. It's more authentic.) Then put the whole shebang back in the fridge or freezer to cool. Again. Lots of cooling in this routine.


Step #9: Make a bunch of other sugar and oatmeal chocolate chip cookies for kicks and giggles.


Step #10: Put all of your deliciousness on festive plates and deliver to friends and neighbors. You are 100% guaranteed to successfully spread Christmas cheer. 

Bada bing, bada boom. Truffle on, brave readers. Truffle on.